According to Filestage, there are nine effective ways to optimize the Graphic Design Process. Having a solid graphic design process will help you deliver better designs. Although the graphic design process is relatively standardized, there are ways to improve the workflow. The graphic design process describes the different stages of a design project. It can be broken down into four sub-processes (definition, creation, feedback, and delivery) and consists of 9 single steps. This approach can be used for almost every design project.
1. The Creative Brief
The first step in the creative graphic design process is the creative brief. It helps the designer learn more about the needs of the client. This step is critical since the designer needs to gather as much information as possible about the client, his or her company, and his or her project expectations.
2. Graphic Design Research
The goal of the research step is to learn more about your client’s competitors. Your rivals’ designs can be good sources of inspiration. You shouldn’t copy them, but analyze what works, what doesn’t work, and how you can make improvements. Ultimately, you want to be different, but learn about the common tones and styles.
3. Brainstorming and Mood boarding
Once you have a good understanding of your client and his or her competitors, it’s time to generate design ideas. You can use a pen and paper to map out the purpose of the design. What emotions and thoughts should you use as design triggers? What’s the message of the design? Of course, brainstorming means that you’re coming up with a lot of ideas. But keep your main focus in mind while shooting out designs. After gathering some ideas, you can create a mood board that will allow you to gather your ideas.
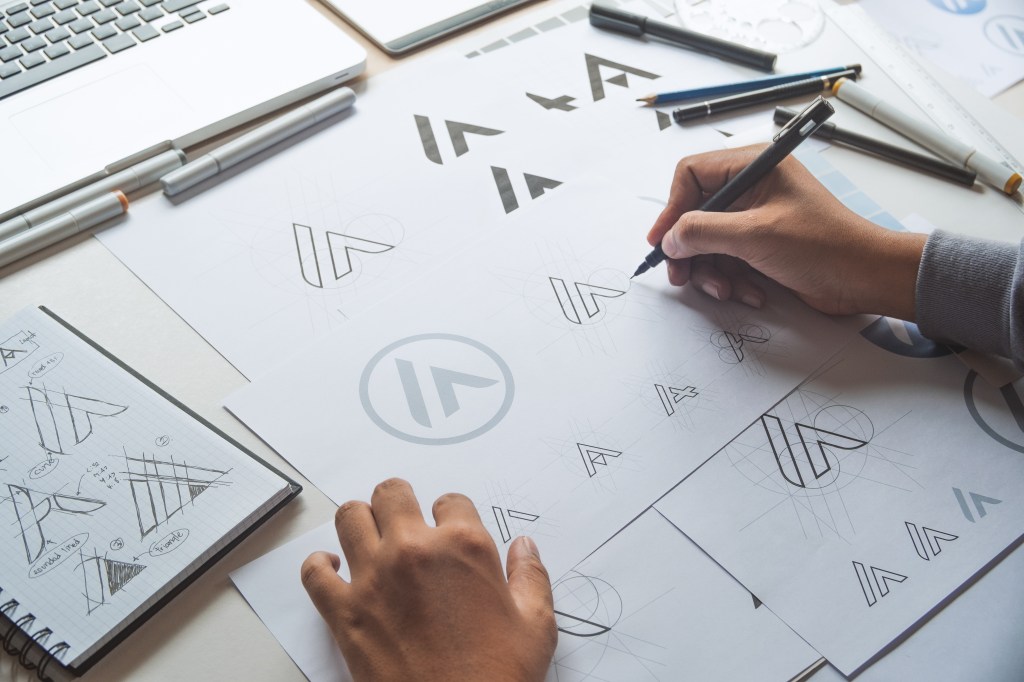
4. Sketching the Graphic Design
Now it’s time to build on your prioritized ideas and start sketching. Often, you still won’t use a computer for your sketches. And you don’t need to sketch online. Instead, start offline, which will help you concentrate and remove any digital distractions from your workplace. You could use a large sketchpad and your favorite pens, which will allow you to minimize distractions and optimize your productivity and focus.
5. Graphic Design Production Process
After you’ve shared your best sketches with your client, he or she will provide you with initial feedback. Now you can (finally!) start working on the final designs. At this stage, it will be important to come up with different variations of designs.
That way, you’ll allow the clients to choose between existing designs. To build these designs, you’ll probably need a lot of different graphic resources; you shouldn’t create everything from scratch.
6. Refine Design
Let’s face it. Your clients will always have plenty of feedback and change requests. In other words, you’ll need to start refining your designs. But before presenting the designs to your client again, you can ask other people for instant feedback.
Share your work with professionals and engage with other community members.
7. Presenting
The way you’re presenting your work will affect your number of revisions, as well as the related feedback. Of course, it also depends on your clients. Being able to tell a story about your designs will help you influence and convince your client. Take the time to properly present your work. Of course, you can’t schedule a one-hour meeting every time you change something. But schedule calls for design milestones and important changes.
8. Client Approval Process
In most cases, you’ll get a lot of revision requests and plenty of unstructured feedback. Hence, you must gather the feedback, structure it, and implement the needed changes to establish an approval process. Easier said than done. Online proofing tools such as Filestage can help you structure feedback and speed up your review cycles. You can upload your designs and invite your clients to review them. Then they can directly comment and markup your files. After implementing the requested changes, you can update a new version, and the feedback cycle starts afresh.
9. Final Delivery
Congrats! You delivered the final design(s), and the client is happy. Time to send out an invoice. Make sure that you’ll get your money as quickly as possible. This assurance requires creating an invoice asap. So, forget about your templates. Just use a tool like FreshBooks, QuickBooks, or Xero.
Workshop Challenge
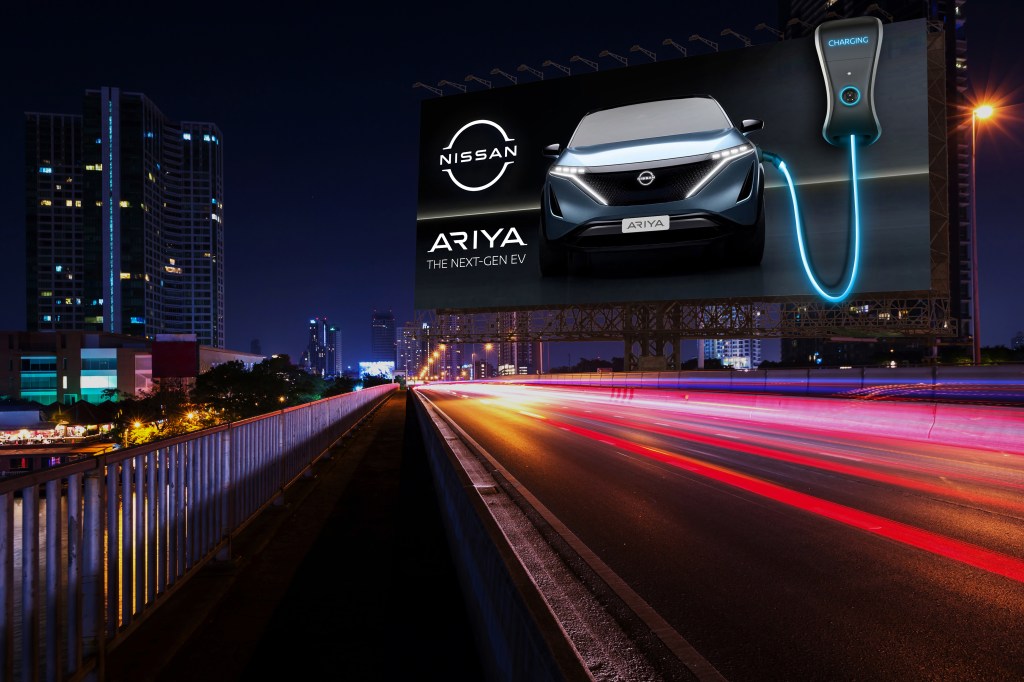
It is critical for the success of my design concept to test the special executions of the various medium. The most important one is the billboard out of the box idea which utilizes an actual size of the charging station and an actual wire for it. These should be coming out from the billboard and illuminating including the car’s lights. I had to sit down with the production house to discuss the details and how to make this happen in actual life. An actual Nissan charging station is provided, and the illumination will happen will LED blue lights. The lights will be switched on once the sky darkens towards the evening and will be very visible once night has fallen. I agreed to test out the structure and lights on a billboard platform next to Nissan main office in Sitra (an industrial area). The testing will take place at 6p.m. to ensure the lights are tested. I have asked for the Marketing Manager and other designers from the team to join to provide their feedback on the prototype of the billboard execution. I’m also working with the newspaper publication to test out the materials involved that shall be used for the special execution press ad. Several materials are provided to choose from for the best results. I have decided to go with the blue metallic pantone that shall be used for the charging station wire and the ring surrounding the car. As for the billboard, the LED lights worked, but after discussions with my team and colleagues, we have decided to keep the lights also during daytime for a stronger effect.
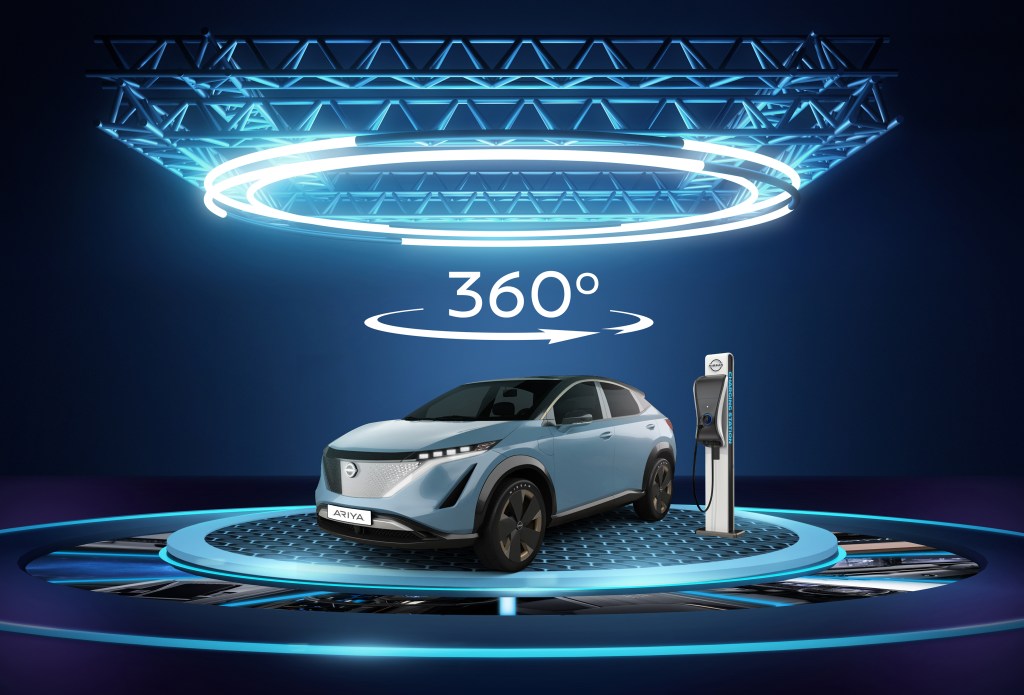
The construction of the stand with the 360-degree rotating effect is a tough one. So, I started working with the events supplier for several techniques to test out the different possibilities for rotating the car and reflecting with the projector. There were several refinements to get the best possible outcome. Testing the stand would take about two weeks including building the actual platform. The platform stand has many parts so installation will also take a couple of hours prior to the event. Timing has to be calculated beforehand to ensure delivery on time. There are several installations to bear in mind for this project. One for the VIP launch event – outside the Four Seasons Hotel at Bahrain Bay. And the other two will be for the activations (indoor and outdoor) at the Avenues Mall. The one used for the VIP event, will also be used for the indoor activation (which will happen a day after). However, the outdoor one outside the mall on Bahrain Bay will be different and will have a huge screen display for the brand videos. The VR activation shall be used for the indoor activation only, so things must be tested before hand to ensure proper electricity is provided by the mall. The VR technology must be synced with the Nissan VR video to display the indoor features of the car and the driving capabilities.
Omar Mal,
November 25, 2020
